Back to Contents
Back to Railways Page
Link to Sitemap
BR38.2
38 205
Normally I'd start a page by introducing the prototype or the model. In this case it's a bit harder. For a start I think I should apologise for the 'average' photos, taken with an early 3Mp point-and-shoot camera they are, to say the least, a bit 'iffy'. The model was built at least five years ago, so details of the construction are also a little hazy. However this model remains one of the most popular with those who've seen it and it represented a landmark for me - it was the first of the 'new breed' of fully detailed Deutsche Reichsbahn locos. As you'll see from the construction and what was involved 38 205 was a 'must have' model. And there was no easy starting point...
I decided to make the model of 38 205 as running, when preserved, in the late 1970s. This means fairly careful selection of details, for example the pumps carried are not representative of the loco in revenue-earning condition. The low running plate versions of the BR38.2 present an outline that in many ways seems familiar to British eyes - the Belpaire firebox and simple running plate are both similar to British locos. So I didn't feel too much fear starting this project. The Model Loco BR 19 was being started at around the time I started to throw bits of this loco together and one learnt from the other. Both ended up with extensive use of Weinert parts; at the time they were a recent discovery and something of a revelation to me. Nowadays I seem to question why much of the British stuff is so naff, rather than being in awe and wonderment at what the European suppliers are doing. But I digress... (no change there then!).
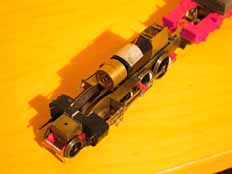
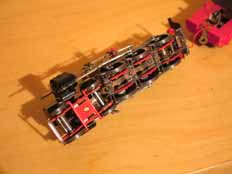
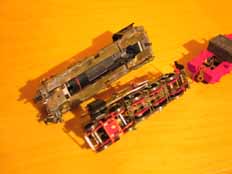
As is typical when scratchbuilding I started by planning the loco chassis. I knew it was going to be a pain to balance with the driving wheels both small and set well back in the loco. I further complicated things by using Sharman wheels, which are too fine for most European trackwork, putting in a fairly complex compensation system, and then shoehorning in the best motor/gearbox combination I could find. The Mashima 1426 and twin flywheels shown in the pictures has since been replaced with a 1430 (!!) and one flywheel. The Model Loco GB1 44:1 gearbox is a great piece of kit, though I wonder if now I'd be more likely to use a High Level gearbox of somewhat higher gear ratio (60:1 maybe?) and it would probably be smaller as well. It all works, runs very well, but left me with very little room for weight. So strips of lead flashing have been packed into the boiler, under the cab roof and between the frames. The valvegear is actually a set from Comet models for a 'Britannia', suitably shortened this is used with crossheads and slidebars which I think are spares from an 8F chassis. Hornblocks are the LRM lost wax cast ones. Not great detail but they are simple to fit and easy to make work.
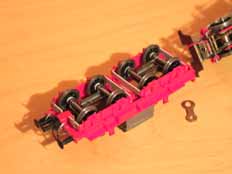
Both the front truck and the tender bogies shown here are built around Perseverence bogie compensation kits. It seems to have worked okay on the loco with its long wheelbase, but they took a bit of fiddling on the tender and never worked all that well - the tender used to rock badly on pointwork. So the front truck remains, while the tender trucks have now been soldered rigid. I seem to remember that the trailing wheels came on 3/32" axles; which can't have helped much. The loco uses the 'American' pick-up system; one rail through the loco, the other through the tender. The wheels have therefore had shortlinks applied as covered here.
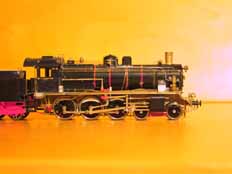
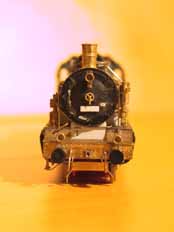
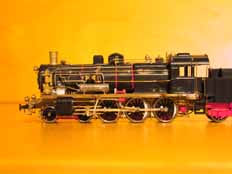
Amateurish photos... The running plate and the chassis are both scratchbuilt in 16/1000" (about 0.4mm) brass sheet. The top of the running plate uses the Weinert etched chequer plate sheet. The front and sides of the running plate were one piece with the cab floor and small dropped section beneath the cab as a second assembly. The etched chequer plate for the top of the running plate provides the strength to the join. The frames in front of the cylinders, with their pony wheel splashers are fitted in the body and help support the front bufferbeam; as well as providing a strong and discrete fixing for the chassis at the front. One of the previous pictures (this one?) may help make this clearer. As the front view of the model shows, good use was made of a decent rivet press for a number of odd jobs on this model - also a handy tool for marking out.
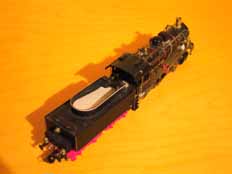
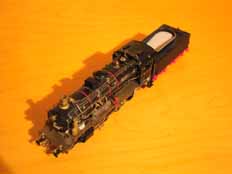
This gives a true idea of how much of the model was built by hand. The boiler was cleaned up to be basically a plain tube. The boiler bands were replaced with cellulose tape (the stuff for pinstriping/'go faster stripes' on cars) I chose red because it would help it show up. All the plumbing, lubrication pipes, control wires, handrails, etc. are made from various sections of wire. The fittings are Weinert; for a Prussian loco if my memory serves me correctly. There were an awful lot of them and even then I ended up having to make certain parts from scratch, the reversing lever and whistle controls are both examples of the latter.
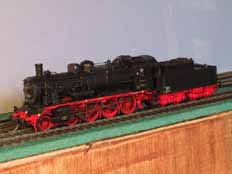
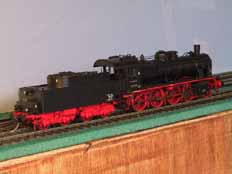
The paint is enamel; Humbrol satin black and Revell matt red (matched to the correct RAL colour). Small quantities of yellow, white and silver have been used for details. The wheels and motion are all blackened with Birchwood Casey Super Gun Blue. The 'coal' in the tender is actually crushed charcoal. Decals and etched plates are from Gaßner, they've had to be slightly tweaked for the loco in preserved condition with extra electrification 'flashes'. Varnish is Ronseal. Now all I need to do is find the courage to weather it!
And then find another Piko donor model to make a standard high running plate version...


