Back to Contents
Back to Railways Page
Link to Sitemap
BR 19
19 017
This model of the Sachsenstolz was built from the Model Loco ML253 'Super' kit, way back in the late '90s. I saved up the money from my first job after graduation to buy the kit, supplemented it with a few Weinert parts and set to with a tube of superglue. Despite it's age and the quality of the build it still looks good and is remarkably solid, even after the best part of 25 years!. Though it does of course have to be built and a large 2–8–2 is never going to be all that easy. It's a model I'm still very pleased with, although I'd now approach it a little differently I think. It's been subject to the odd tweak since it was first built, the latest of which was fitting a Gützold trailing wheel set. It's this small change that has encouraged the update to this piece, including new photos (with a blue background) and a new format to displaying them. The couple of photos showing the underside of the model and the wear to the wheel blackening attest to the fact this has been a popular working loco, and that it's now in need of a short trip to the workbench to attach the odd loose detail and touch up the odd paint chip. In the intervening years Model Loco have stopped producing this kit and none of their German range is still in production, with most now available ready–to–run, in one way or another. Gützold too have had their problems, now owned and managed by Fischer Modell I'm looking forward to seeing their models become available again.
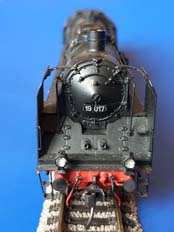
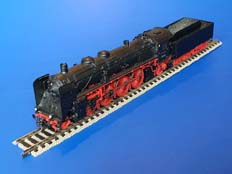
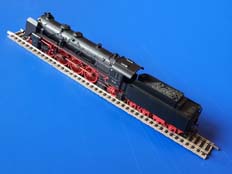
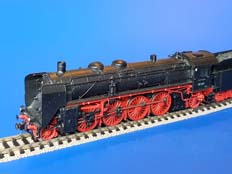
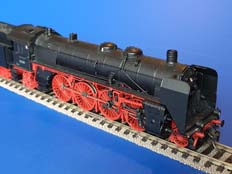
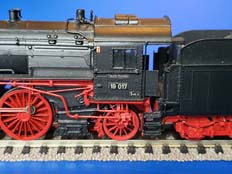
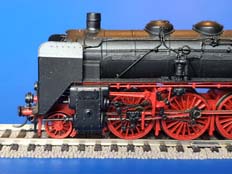
Like all the Saxon locos it has a certain elegance of line and the kit captures the form of the prototype nicely. Etched plates (but unfortunately no decals) are provided for DRG and DR locos including the famous 19 017; the prototype of which is now preserved by the Dresden Transport Museum. The aim was to build the loco in the condition it's preserved, which broadly reflects the appearance of the loco in the inter-war period. If I were building it now I'd dig out a set of Gaßner decals to complete the appearance, but when it was built I had no idea such things were available! It's probably worth me noting that there is a great deal of work above and beyond building the kit to produce this model; illustrations from this 'site have been used by others to illustrate the built kit; in reality it's not quite that simple. The cab-side view shows the model with the correct Gützold wheel fitted. The other loco wheels are perfectly adequate although the kit was originally supplied with a Romford/Markits trailing wheelset which I had swapped for a much finer Alan Gibson equivalent (still with the wrong number of spokes). As Fischer Modell gradually re-stocked the Gützold spares I nabbed a couple of sets of these trailing wheels which will eventually be re-profiled to an RP25 approximation to match the rest of the wheels on the loco.
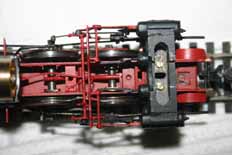
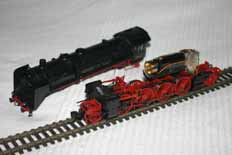
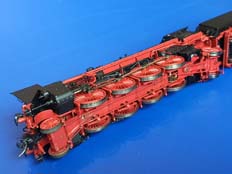
An early trial run of the loco made me realise that the long rigid wheelbase was going to be a pain to keep on the track. So compensation was fitted in much the same way as I had done it on my earlier, British stock. The rear axle is the driven one, and with the narrow frames and restricted motor clearances there's no room for springs compensation beams or for the motor and gearbox to move, so that had to be kept rigid. The coupling rods were jointed on the knuckle using lace-making pins, the wheels dissambled and the axle bearings were assembled into the chassis using a set of London Road Models turned axle jigs and some lengths of 1mmx1mm brass angle to act as hornguides. The front two axles have a simple beam across them, and the third axle is sprung with a phosphor-bronze strip straight on to the middle of the axle. Both the keeper plate and the frames themselves have been modified to allow for the small amount of up and down movement the bearings need in the chassis. The result is a loco that is very sure-footed, running well on a variety of trackwork. In terms of improvements to a new build; the brake pull-rods aren't right, mostly approximating a loco in as-built condition and I'd be putting some side-control on the front and rear trucks.
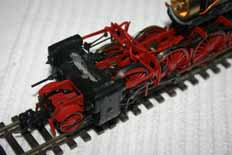
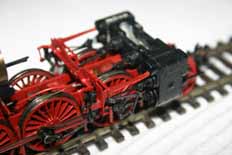
With large wheels, bar frames and a relatively narrow, high-pitched boiler the absence of the inside motion was going to be obvious. So an extra set of Weinert valve-guides were purchased and the links and rocker arms assembled from wire, strip and scrap etches to portray the valve gear for the middle two cylinders. It's somewhat simplified and very much rigid. Also shown in this is one of the later modifications: On the 'insulated' side of the chassis I've fitted a wiper pickup to the top of the first two drivers. This is simply a length of 0.3mm half-hard brass wire run through a short length of insulation stripped from some fine wire. This small assembly is then superglued into a 0.75mm dia. hole drilled in the motion bracket. This means that the loco now picks up from 6 wheels on each rail, these two driving wheels and the tender on one side; the loco's full set of wheels on the other.
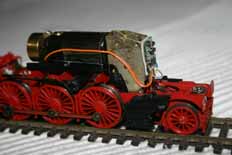
The motor and gearbox supplied are superb. I really like the Model Loco gearboxes and have used them as a preference in some of my other home-built models. But, in this loco the Mashima 1626 and 44:1 ratio provided was far from ideal, particularly at low speed. So I experimented; first with a Faulhaber 1624. This was somewhat inconclusive so it came back out again. Which is why I happened to have it in stock for my ÖBB 2067... I then used a Mashima 1430. This is a very smooth, slow running and powerful motor; which improved the performance immeasurably. The final piece in the puzzle came shortly afterwards when I realised that substituting finer pitch worm and wheel in the top of the box would get me very close to 60:1. The loco's performance is now amazing; powerful and smooth throughout the speedrange and with a realistic top speed.
The DCC installation uses a Zimo MX62 'N-gauge' decoder. I was going to fit a Lenz 'Gold' or Zimo MX64 in the tender; either with on-board power. But despite the assembly being with superglue there was no way I was going to be able to get the tender body to seperate from the chassis without breaking it. So in the loco it had to go; which meant a small decoder and fitting extra contact wipers, as noted above, to overcome any pickup problems. As described previously, the loco uses a variation of the 'American' style pickup (loco on one rail, tender the other) so I did have my concerns. While on the subject of the electrical connections in the loco you'll probably have already noted the use of popper studs to connect the loco and tender, and the chassis to the decoder. They work very well and it's an idea I seem to have forgotten; cheap and reliable micro-connectors are now available off the shelf. All moving joints, such as the conpensation beam to the chassis or the front tender bogie to the frame have been electrically reinforced with lengths of 5Amp fusewire soldered to each assembly; a long loop in the middle makes allowance for the movement.
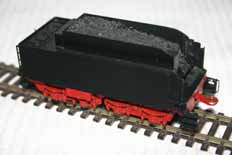
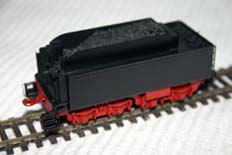
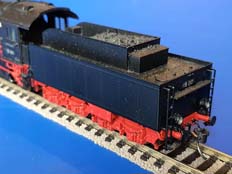
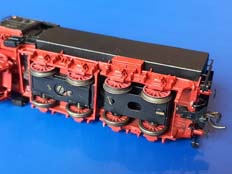
The tender is built pretty much as designed. I've swapped a set of Weinert tender wheels instead of the Romford/Markits wheels provided; they're nickel-silver so easy to blacken and pick up well. I recall that the third axle on the tender was modified to sprung in order to keep all the wheels on the track. The build reflects the lack of information I had at the time: I'd now be fitting brakegear and the various pipes and plumbing would actually go somewhere. Thankfully the lack of brakegear is not too obvious (and could be sorted by attaching parts to the wheel keeper-plates) and the refinement of the tender rear ladders which were assembled from wire on a simple jig is very obvious. The same approach was taken at the front of the loco too.
The loco is now ready for the road; run in and with DCC decoder installed. But since building the model I've found a few pictures of 19 017 in service with the Halle test centre before preservation, which means that this story is far from over...


