Back to Contents
Back to Railways Page
Link to Sitemap
BR50
50 2146-4
This project was triggered by a couple of pictures in a book; 'Dampflokomotiven in Sachsen, Normalspur' which showed a BR50 without an apron plate, no cab vents and coupled to a 2'2't28 tender. It was intriguing to me when I first saw it - I had been told that all DR BR50s retained their apron plates; in fact for a while I thought that 50 2146 was a ÜK (austerity version) BR50. It's not. I've since found further photos of 50 2146 and other DR BR50s without aprons.
My only conclusion from the many DR BR50 photographs I've seen is that there really was no real 'standard' or normal outline. Tenders, cab vents, domes (style and quantity), chimneys, pumps, smoke deflectors, lamps, aprons (full width, narrow or none) all seem to vary indescriminately. It's no wonder that Roco haven't yet released a standard BR50 (as opposed to a Reko BR50.35) in DR condition. What a nightmare...
Never has the modellers maxim of finding 'a good photograph of both sides of a particular loco at a certain time' been truer. It's possible to make some pretty big mistakes. And for those who are interested the loco is modelled as running in 1984. I have been sent a picture (thanks, Phil!) of the loco in 1978 and the condition is somewhat different!
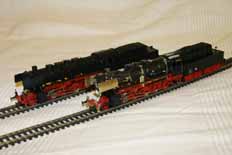
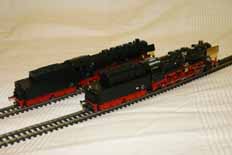
First catch your BR50... This time I thought that rather than a picture of the parts and research material used for the model that a 'before and after' might be more useful. At the very least it shows the changes made; incidentally the changes required to model this loco in late 70's are somewhat less. You don't need a new tender body for a start. The starting point is a Roco BR50, one of these earliest models of the DB variant is now available fairly easily secondhand. As a bonus it's also one of the cheapest variants to get hold of:- In part because it's not 'DCC ready'. More of which anon...
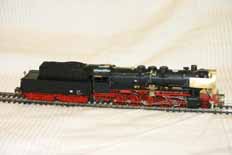
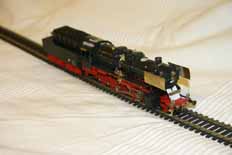
A couple of 'general' shots to show the nature of the work involved. It's fair to say that other than swapping the tender body it really comes down to a detail job. Admittedly a fairly extreme one! Some of the detail has to be scratchbuilt; smoke-deflectors, additional washout plugs and the modification to the front steps, etc...
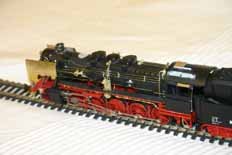
Once the front feed-dome comes off there is a reasonable amount of plumbing required. As the donor model is a DB prototype the pumps are the first things to require swapping. Which also means finding a way to fix them in place; for the feed-pump on this side I used a bracket made from plasticard stuck to the side of the boiler. The lighting conduits along the underside of the running boards were also replaced, unfortunately in the process the lift-link for the reversing gear comes off too. That will be replaced with a brass or nickel-silver one when I fit the Weinert valvegear and wheels to the chassis. You might also be able to make out the detailed plumbing added to the injector on this side.
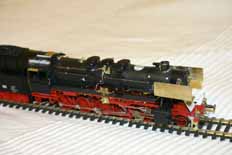
On the driver's side of the loco the pump had a brass wire soldered along the back; this wire was then bent and trimmed to fit in two holes drilled in the back of the running board. The other plumbing, such as that from the dome helps steady it. The filling in the dome on the top of the boiler was mostly done with plasticard, a little filler was added afterwards to give a smooth appearance. In any case there's a piece that needs to be removed from the boiler weight to provide clearance for whatever is used to bung-up the hole. While the boiler is apart to release the weight the addidtional washout plugs carried by many DR BR50s can be added to the lower front of the firebox. I turned a section of plastic sprue with old needle files and emery paper in a minidrill. A hole that would be a little tight was then drilled in the lower part of the firebox and the section of sprue was then pushed through, solvent applied from inside and left to dry. Once it was nice and hard the excess sprue was trimmed off from behind; the resulting washout plug can be seen in the photo it's the grey 'blob' just below the rear sand-dome. To finish off the lubricator lines around the washout plug were replaced with 5Amp fusewire.
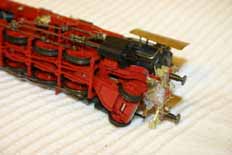
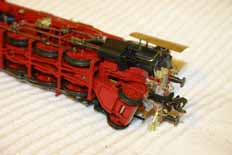
A quick 'before and after' of the front of the chassis. Though in effect I suppose it's an 'after and after'! The first shot shows how the front of the frames has been detailed with steps, grabs, lamps and brake pipes. I've also made up a little bracket to go under the frames to support the guard irons and improve the outline of the frames in this very open, and therefore critical, area. The front truck can be trimmed short and the coupling bracket (if fitted) can also be removed. The coupling hook is by Alan Gibson, filed down slightly, with a loop of wire soldered in the top of it. This wire loop works with the two wires shown attached from the guard-iron bracket to hold the Kadee coupling as shown in the second pic. A #18 in this case.
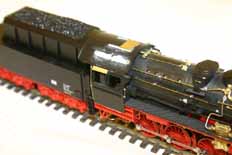
The cab needs a bit of work! Unfortunately, despite all the work I've done here it's still not finished either. I found a couple of photos of the back of BR50 cabs and there should be a draft screen across the back of the cab. Not a major issue, though it will muck up the Roco cab door system, I just need to get round to it. However the work done includes the new DR roof skylight and sunshades, filling the cab roof vents and replacing the handrails. In the fullness if time it'll also gain a decent set of etched 'plates. On the top of the firebox are the new safety valves and fountain.
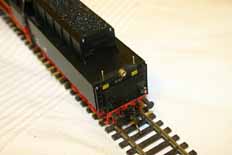
Thankfully there's not much required to do to the tender body; two new grabs and a lamp! When the chassis gets re-wheeled I'll detail the rear bufferbeam.
There is more work to do to this loco; new wheels and valvegear have already been alluded to in the text. I'd also like to sort out the back of the cab and do a full detail job on the chassis. There's a DCC decoder to be fitted too. Then there's the slightly warped chassis block, an unfortunate problem that seems to strike Roco BR50s at random. Still, I suppose it's something for a second page...


