Now, you may be interested in any, none or all of those things so I've decided to try and deal with them as seperate threads. Hopefully I'll manage to tie them all together and complete the model...
This is a good example of our concept of 'detailing' and how it extends under the hood. Not only has the body been titivated; I've also fitted a replacement set of wheels, better motor, DCC decoder and Kadee couplings.

Now, you may be interested in any, none or all of those things so I've decided to try and deal with them as seperate threads. Hopefully I'll manage to tie them all together and complete the model...
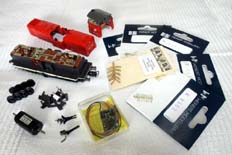
The raw ingredients included a Roco model of the 2048, new motor (Mashima 1430 in this case), new wheels (10.5mm discs, RP25 profile), Kadee #20 couplers, DCC decoder (ZImo MX63) and a short stack of detail parts. The latter includes sprung buffers, brake pipes, windscreen wipers, cosmetic coupling hooks and 0.45mm handrail wire.
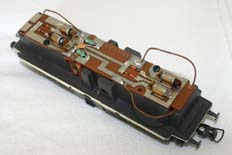
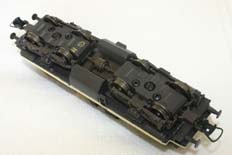
It seems sensible to me to start with the chassis, the new wheels, motor, DCC decoder and couplers have all got to fit into, on or around this assembly. The two pictures here show the chassis from above and below in 'as delivered' condition. You'll note the lack of provision for DCC, relatively coarse NEM-standard wheels, traction tyres and the cute (but almost completely pointless) moulding of the drive line underneath the fuel tank. The couplers are mounted in flexible (but not close-mounted) boxes, fixed to the trucks - this latter point is seriously bad kharma if you're using Kadees.
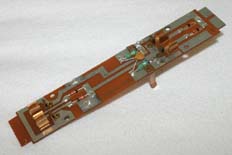
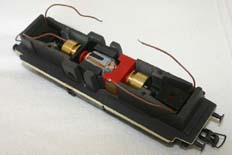
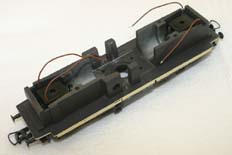
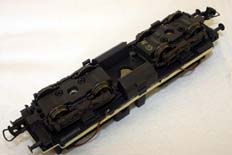
The first stage of the strip down of the chassis involves simply removing the circuit board by unsoldering the four wires from the bogie pick-ups and undoing the two fixing screws. This reveals the motor underneath - nasty shock isn't it? It's a bit of a surprise to find such a simple open-frame motor in a modern model. My experience of this particular power unit in a variety of models hasn't been hugely positive; that's why it'll be changed for a Mashima!
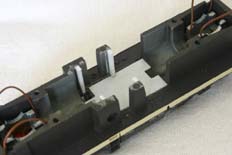
Thankfully removing the motor isn't a particularly strenuous task - shuffling it back and forward in the chassis will release the cardan shafts (drive couplings / universal joints) at each end and the motor will then lift out. At this stage I also pushed off the moulded drive coupling from underneath - it can't be seen from any conventional viewing angle and is a useful space to put a DCC decoder. Being outside the model the decoder will stay nice and cool too.
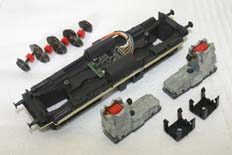
To strip the chassis down further and release the trucks is a bit harder. The gearbox worm clips shown in the bottom right hand corner of the photo, above, need to be unclipped from the bogies while still in the chassis. It's not the easiest job in the world, but is about as hard as this conversion gets. I used a small screwdriver to flick the clips off, holding them open by pushing a thin piece of brass into the opening. Once all four clips are loose then they'll come off easily.
Once the gearbox covers are removed it's then a simple case of removing the worm gears and shafts from the top of the gear bogies and undoing the screw in the middle of the truck. The gear bogie can then be removed from the main chassis block.
This picture also shows how even a large(ish) decoder can fit under the fuel tank. In this photo it's a Zimo MX64. In practise I used a Zimo MX61/2000 as it's a bit narrower.
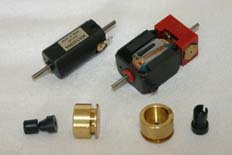
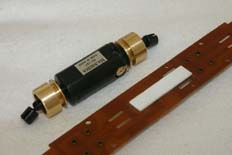
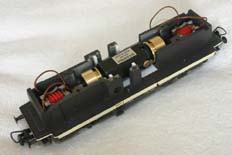
With the chassis partially stripped down, now seems a logical point to talk about re-motoring with the Mashima motor. I've used a 1430 to replace the Roco open frame thingy. As you can see in the picture, their overall dimensions are similar. By virtue of it's better construction the Mashima manages to be more powerful with more torque, quieter and with a great deal more smoothness; particularly at low speed.
So it's a bit of a no-brainer as far as I'm concerned! It's not too tricky either. On my loco the flywheels simply twisted off the original motor shafts - I suspect a small diameter drift would make light work if yours didn't come off quite so easily. They were then re-assembled onto the Mashima motor using a little thread locking compound (Loktite 242 or TL42). The only thing to make sure of is that the length over the flywheels is the same on the new motor as it was on the old. Taken to its extremes if they're too far apart they won't fit in the chassis and if too close together the cardan shafts won't reach!
There is some plasticard packing required in the chassis, including a thin piece of plasticard stuck to the underside of the circuit board, in order that the new motor is held centrally in the location vacated by the old motor.
On the next page we'll look at how to fit the DCC decoder and new wheels before moving on to the detailing of the model.