Back to Contents
Back to Railways Page
Link to Sitemap
LTE BR185 (Bombardier Traxx F140AC1)
185 528-7
Austrian-based operator LTE has leased three 185.1 series locomotives from Angel Trains, these locomotives are all equipped for operation in Germany (15kV), Austria (15kV) and Hungary (25kV). It started with the new 185 528 in January 2004, nicknamed 'Hermine' and with large LTE logos. In March 2006 185 529 (Ex CFL lease) 'Michaela' joined, not only carrying LTE logos, but additonal European Bulls logos. LTE is also a member of this pan-European freight transport association. In November 2006 185 524 (also Ex-CFL lease) 'Andrea' joined the fleet as a third machine. The Trix BR185 is available in LTE livery as their longest served example; 185 528.
The Trix BR185 is a lovely model, good value for money and is even has an in-built DCC decoder. It'll even run well under analogue control! It's also ripe for further detailing as the photo above of the completed model shows. In this page or so I'll demonstrate some of the simple details I've added to my model. For your reference, the DCC capabilities are reviewed here.
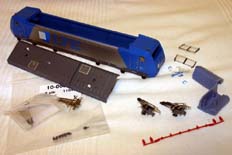
The first step is to remove the body from the chassis and then seperate the body into its components. This makes life easier when it comes to adding the replacement Roco pantographs and brass wire handrails.
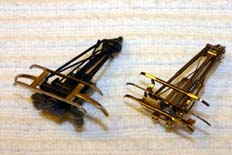
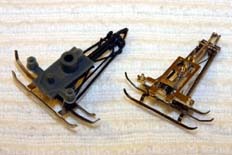
It's pretty easy to see how much better the Roco pantographs are in terms of appearance, when compared with the original Trix versions. What can't be illustrated here is that the Roco ones not only look better, they also work better. For a start the pantograph head stays level when run along a catenary wire...
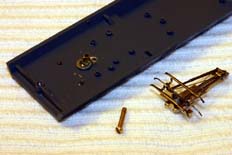
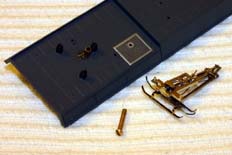
Fitting the Roco pantographs unfortunately isn't quite as simple as just screwing them in place of the Trix ones. The mounting points for the fixing screws are different, though the positions of the insulators are certainly compatible. After aligning the new pantograph on the roof, the position of the fixing screw can be marked, the hole filled and then it can be pilot drilled. Opening the hole out for suitable tubing to take the fixing screw means that a piece of tube can be used to get the correct height - this stops any distorsion of the frame of the pantograph when screwed down properly.
The length of tube mentioned above can be seen here - you'll also note that there's a slightly cheeky piece of wire sticking out in front of the tube. This is to stop over-rotation of the pantograph head when the pantograph is fully extended.
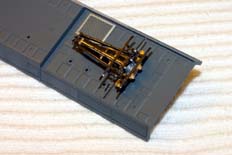
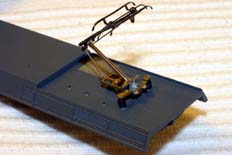
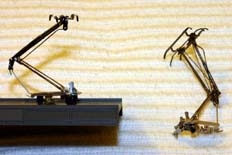
And here's three views of the pantograph fitted to the roof. The third shot is in there to demonstrate the effect of the additional stop wire, compared with an unconstrained pantograph.
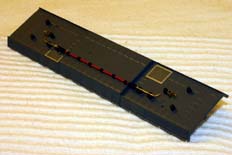
This is how the roof looks after the tweaking is complete. The new pantograph mountings are in place and additionally I've added wire to finish the conductor bus-bar, which has had part lines removed and been detail painted - mostly in red and chocolate.
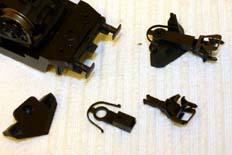
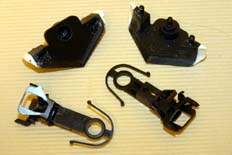
Next step is to have a look at the chassis. There are a few tricks that can be pulled around the front of the loco. The plough can be widened and, maybe most importantly, the coupling shortened. These two jobs significantly improve the appearance around the front end of the loco, the shorter coupling helping when pulling a train. And I can't even begin to wonder what criteria Trix applied in order to make the coupler box so long, even with the 2mm reduction I've applied it'll still work comfortably round 18" radius curves.
All of these modifications have been applied with superglue and pinned with wire. The surface of the Trix plastic parts was keyed with emery paper before bonding simply because I wasn't sure what grade of plastic it was and therefore was uncertain about how well it would bond. The pin through the coupler box is only glued on its 'head' so that the bond can be broken if a coupler change is required.
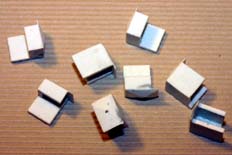
One other job I wanted to do was to build up the depth of the sandboxes - out of the box they're very flat extensions of the bodyside. So by carefully trimming the sandboxes as cast and making up these extension parts some nice extra depth can be added below the solebar. The extensions are made from sheet plasticard and are designed to be fixed to the chassis. The break between the body sandbox and these parts is at the angle between the side and base. There are two different styles, each of which are handed. So eight sandboxes of four different types.
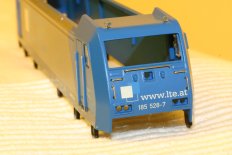
The handrails on the nose end have all been replaced with 0.33mm brass wire - looking at these photos makes me realise that I could have used a little more superglue to install them and fill the original fixing holes. You'll no doubt have also noticed that I've not done anything to the bodyside handrails. This was to avoid a full strip and repaint job.
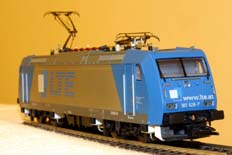
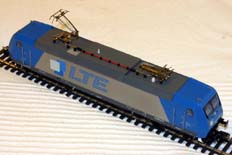
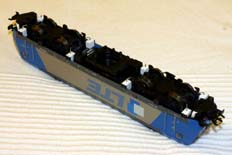
Here's three pictures showing the completed model with some of the detail painting left to do. The sandboxes have been fitted and have rudimentary sandpipes made from copper wire. I've added pipes and a coupling hook to the buffer beam also using copper wire.
Next job is to finish the painting though it's not necessarily straight forward. The blue doesn't seem to be readily available so that will need mixing. Most of the underframe gear is black, but I may decide to paint the cast-in plumbing silver as is prototypical. The wire ends of the conductor bus bar need to be white, as do the couple of other odd roof fittings.
So there we are - a true case of 'guilding the lily'. A lovely model that's been affordably and quickly improved for exhibition use. It can now be considered to look and operate alongside it's other (mostly Roco) layout mates. And that's all I was aiming for...


