Back to Contents
Back to Railways Page
Link to Sitemap
BR52
52 5885-0
An unusual variant on the Kriegslok theme this. In fact at first glance it looks like a BR50. It appears that a small batch of BR52s ran with a modified version of the 2'2't26, leading to fairly widespread confusion as to whether this group of locos should be classified BR50 or BR52. No publication house seems completely immune, though I'm not going to point any fingers! In case you're wondering, the only sure-fire way to tell the difference is the motion bracket...
So we've got a fairly unconventional loco to build, the Dresden location of the prototype meant that it would have to be included in the roster. And as I said, it looks like a BR50; so I used a Roco DB BR50 as my starting point. I was going to treat it as a straight conversion, but ended up chickening out after contemplating scratchbuilding the motion bracket. A comparison of the Roco BR50 with a Liliput BR52 seemed to raise some interesting possibilities - if I could overcome the issues with the Liliput BR52. But the question then was what to do with a Roco DB BR50 body and Liliput BR52 chassis and tender? Well Dave has the answer - in due course he'll be writing up his DB Wannentender BR50...
Naturally the first place to start was simply to judge the feasibility of swapping the loco bodies. I was initially planning to rebuild the BR50 loco body completely, but eventually realised that a few, mostly minor, adjustments would get the Liliput BR52 body, cylinders and motion on the Roco chassis. The most obvious question from that point onwards was whether to modify the body to fit the chassis, or the chassis to fit the body. When doing conversions like this the answers to that particular question are often far from obvious, but in this case it seemed good sense to modify the Liliput parts to fit the Roco chassis. So I now had the ideal combination; a Liliput BR52, Roco BR50 and a mate who'd take the left over parts off my hands. Game on!
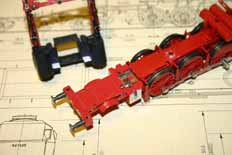
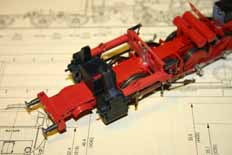
The first job after all the prevarication was to fit the cylinders and motion to the loco chassis. This would help set up the front of the loco as it supports the smokebox. Running a steel rule over the cylinders revealed an interesting coincidence - both measured 6mm from the piston rod to the inside top of the cylinder moulding. So there weren't going to be any nasty height issues to deal with. Width across the inside of the cylinders was another matter entirely; I had to use a piercing saw to trim a chunk off the outside edge of the cylinder support blocks of the chassis. See; nice shiny zinc...
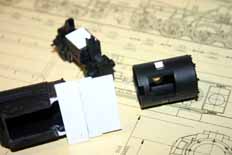
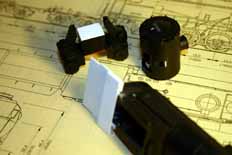
The position of the cylinders on the chassis was also critical in terms of the distance between the centre of the cylinders and the axle of the middle driving wheels. On the Roco model this is 55mm. It must remain this distance otherwise the crosshead will hit either the motion bracket or the back of the cylinders. A couple of 6mm x 3mm pieces of 20/1000" (0.5mm) plasticard were used as packing. Being a considerate sort of chap I used white plasticard so you can see it in the pics. There is some filing to the cylinders to get the fit spot on; about 1mm needs to come off the bottom of the back mounting so it sits down over the Roco pickup cover and the slot at the front needs widening to fit round the front frame section over the pony truck. It should all be obvious though.
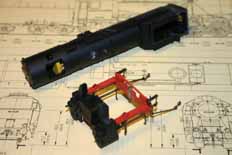
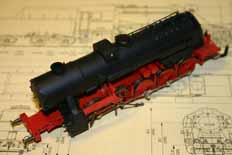
Before we go any further I should point out that the crossheads and coupling rods have been deliberately removed. If you want your Liliput valvegear to function normally, as intended, then don't even try this; keep it all together. That's the closest thing to a warning that you're going to get...
With the cylinders installed in the chassis attention turns to the motion bracket. This needs 1mm trimming off the bottom so that it can fit cleanly on the Roco chassis - as with the cylinders it's to clear the pickup cover. I went to test fit the boiler at this stage; cutting a hole out the bottom of the firebox is the first step as it allows the back of the boiler to fit over the firebox. Well nearly! The weight clonked on the top of the gearbox cover so it needed releasing from the body (undo the screw in the underside of the boiler), moving forwards by about 6mm, a hole drilling for the screw and then re-fixing (put the screw back!). Incidentally - while the weight is loose you can use it to pop the smokebox off the boiler. If you want to. It might help later on?
The boiler will now drop on the cylinders and probably do a reasonable impression of fitting around the rear of the loco too. The height between the top of the pickup cover and the bottom of the boiler can now be measured and a piece of 2mm i/d tube cut to this length. You can see it's been fitted to the motion bracket, in future it'll have a body-chassis fixing screw passing through it. Be careful when cutting the motion braket - with only the weighshaft holding the two parts together it's very fragile. To reduce the amount of stress on the moulding I made my cuts with a piercing saw.
The piece of tube was held in place on the chassis using a Roco fixing screw and an M2 nut. The cylinders were lined up on the chassis and the motion bracket carefully slipped in place. A little thick superglue was then run in around the tube to fix it in place in the motion bracket. After it's cured off the screw can be released. I then popped the boiler moulding on. Once you've reached this stage I think you've broken the back of the work. It's nearly all downhill from here.
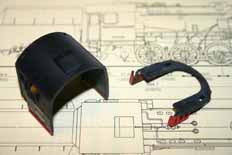
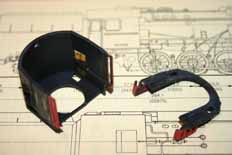
Well I did say 'nearly all downhill'. You may also remember a mention of 'issues' with the Liliput BR52. Most of the issues concern the cab. I believe it's widely known now; but the Liliput BR52 models come with BR42 cabs. No biggie you may be thinking. Well actually... It's too long for a BR52, by about 2mm. Yet the overall length of the model from smokebox front to cab rear is pretty good. Which means that the front of the cab is mounted about 2mm too far forwards. But the proportions of the boiler are very good and the running plate is spot on for length. So what to do?
The answer is to carefully move a few bits around slightly to improve the appearance. You might be interested (but doubtless not surprised) to find out that it makes it all a great deal easier to fit to the Roco chassis. So the cab needs shortening by 2mm, positioning with the front around 2mm behind it's original placement and the running plate needs to move back to meet it. Easy huh?
I'm sure that the scariest bit of this work is shortening the cab. The first two pictures show the first cut. I started by marking around the sides of the cab 2mm from the front with a pair of dividers. The line was then carried up over the cab roof. Working just to the front of the line with a fine razor saw soon had the front of the cab off. The sides and roof were carefully filed back to the marked line and the front was rubbed down on coarse wet and dry paper until it was flat. Not hugely important that last stage - it just helps keep the work neat.
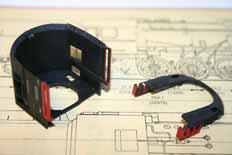
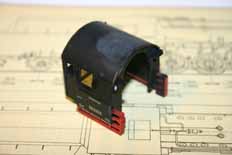
The next stage is to chamfer the inside edges of both the cab front and sides/roof. This will allow the front to sit inside the sides with a continuous mitre joint running around the front corners of the cab and across the roof. If the work is clean enough then after fixing (plasticweld) filler will only be needed to blend the roof join. For my loco the roof vent cowl also needs to come off to be replaced with a Weinert skylight vent and grille.
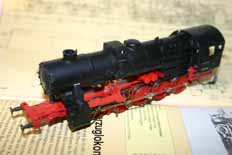
The last structural work is to set the ride height of the loco on the chassis and assemble a cab floor, the latter has to take the Roco close coupling mechanism into account. I found the body of my loco was riding around 0.5mm too high so 20/1000" (0.5mm) plasticard was used strategically to jack the front of the loco up. At the back the assembly used a mixture of 20/1000" and 40/1000" plastic. The latter makes up the cab floor and also packs up under the back of the firebox. The thinner sheet piece was added later to get the height correct.
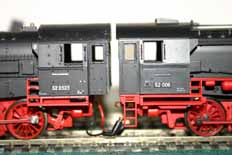
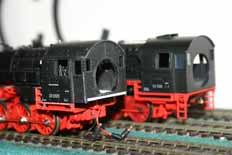
That's it. The structural work is all over; now it's just detail. I admit that the running plates are a fairly significant detail, but they don't really affect the line and lie of the model. Anyway - at the time of writing this I haven't decided exactly how I'm going to do them. I feel I should just mention that none of the major assemblies have been stuck together yet. That part of the assembly won't happen until after painting. In each of the photos of the cabs the left hand one is the bodged Liliput/Roco, a Gützold one is on the right...
The next page will deal with the tender and detailing...


