Back to Contents
Back to Railways Page
Link to Sitemap
BR 03 Einheitslok
03 001
The pre-war BR03 was split between the DR and DB (with odd locos finding their way to Poland etc.) after 1945. The first of the BR03s ended up in East Germany; '001 was one of a small handful (deliberately?) kept largely in pre-war condition. There are several good ways of making models of the Einheits BR03, ranging from a major re-build of the Märklin model with it's excellent body and poor chassis, through the Fleischmann model to Weinert's extravagant whitemetal kit that fits on a Roco BR01 chassis.
I took the middle path, using the Fleischmann model as a basis. It's certainly a good starting point; the lack of detailed bar-frames is my only major gripe. The plastic body is easier to work on than the zinc alloy of the Märklin (and the chassis is much better!) and it's much cheaper than the Weinert kit. Well; I suppose it might have been if I hadn't decided to do 'the works' and bodge together a new tender at the same time...
We start with the tender. 03 001 seems to have retained a short, 2'2t30 tender for most of its life. By the time she was withdrawn (around 1970) pretty much the entire loco was life expired. In fact in the subsequent restoration during the mid 1970s the tender was considered to be too much like hard work and the loco returned to steam with a large 2'2't34 tender. It wasn't until the 1980s that 03 001 was once again re-united with her short tender.
Even in model form the short tender is bit of a problem. As far as I know there hasn't been an r-t-r model and the Weinert (costly) and Günther (no longer available) kits are the two most prominent options. However; Revell make an excellent, plastic, 2'2t30 kurztender that comes as an option with their BR43, or with the BR02 kit. In either case it's only about £12 for the kit. Next job - find a drive system!
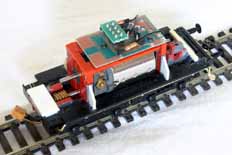
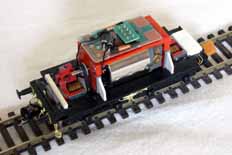
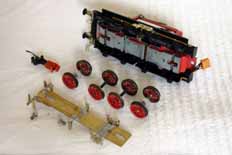
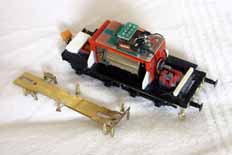
Enter a spare tender drive from a Liliput/Bachmann BR18.3. (The more informed of you will no doubt have just worked out what happened to the rest of the loco...) This is a good, smooth, quiet drive with an axle spacing that is very close to that required. In fact for most people it's probably good enough. Unfortunately I'm not 'most people' so had an extra half hour job to contend with. Thankfully it's not difficult, a careful trim out of material around the axle slot with a razor saw solved the worst of the problem, any deficiency was then made up with some scrap brass from a fret. No big deal though it will need doing before you fix the drive to the new plastic parts. The wheels were changed too; Weinert wheels were blackened and had spacing washers added before swapping the gears and fitting. Not only is the profile of the wheel better, this also gives the option of fitting an extra set of traction tyres and means that the spokes become see-through. Having webbed spokes, even on a tender, is not really acceptable in this day and age. C'mon Bachmann I think you can do better.
I checked that the drive could be stripped down if the plastic frames were attached and then set about cutting around the mouldings to make the parts fit together on the chassis. Much of this was done by trial and error until I got it where I wanted it; level, at the correct height and with the wheels in line with the axleboxes. The front and rear fixings (white plasticard) were then added to the plastic mouldings once I knew the position they had to go to get the attitude and alignment right. They were then superglued to the chassis block. Finally the plasticard triangles were fitted; plastic weld on the plastic-plastic joints and a good quality, thick superglue to tack and position the metal-plastic joints, finishing by running in liquid superglue. Classic 'bodger's art'.
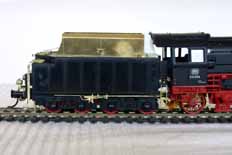
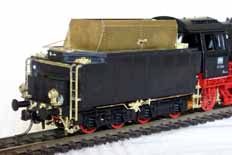
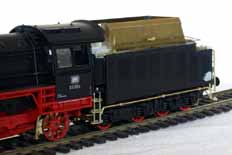
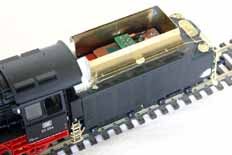
Tricky job #2 - the bunker. This will be a problem no matter what your starting point. The Weinert 2'2t30 tender hasn't the correct bunker for 03 001, neither has the Revell and the Günther kit does a rather nice impression of a hens tooth - and even if you find one it might not have the correct late, high bunker. If you don't fancy scratchbuilding now is the time to back away carefully. It's normally at this stage in the conversation that I start to detect the 'nod and smile sweetly' routine. To further encourage the use of original source material I'm not going to put up any fancy cutting lists or dimensions. In part because I'm not entirely convinced I got it spot on and I'd never forgive myself (for which read 'laugh profusely') if someone followed my mistakes. For those who are interested it appears that the bunker has much the same dimensions as the late bunker fitted to the 2'2't32 tender. On the other hand you can chicken out; build another BR03 or run 03 001 with the 2'2't34 tender as supplied by Fleischmann - plenty of people do...
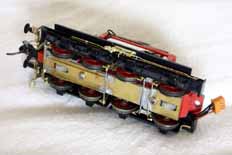
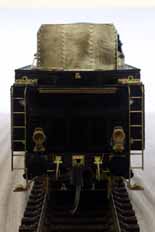
The rest of the tender is just detailing really. Okay, so the chassis keeper plate has some functionality; serving both to keep the wheels in and stabilise the coupling pocket for the Kadee #20 coupler. The other pictures here just serve to show how much latent potential there is in the Revell mouldings. In most cases I decided well in advance which Weinert parts I was going to add and removed the equivalent details from the plastic mouldings with sharp scalpels, files etc. before the parts were removed from the sprues. A few finer details and it goes from 'cheap plastic' to a very classy model in its own right. Incidentally, the 2'2't32 is equally as good, it's just a shame that the earlier (Esci originated) tooling of the BR41, BR03 etc. means the 2'2't34 is so poor, the Kabintender with the BR50 has a lousy chassis and the 2'3t38 is dimensionally all over the place. All the newer Revell-tooled railway kits are good though and the other tender types are available r-t-r from one manufacturer or another.
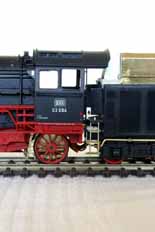
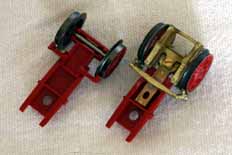
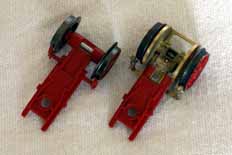
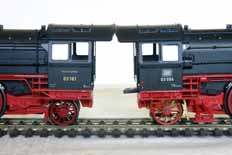
So with the tender progressing nicely I turned my attention to the loco. To start gently I thought I'd have a go at fitting the new trailing wheels. So after blackening the wheels I began by fitting them into the front bogie. You can imagine my surprise when I found that they fit well, spot on with respect to the brakegear. The rear truck under the cab was going to be a different matter though. I quickly popped the Weinert wheels into the Fleischmann truck to see how much clearance I had. Not a lot. So I now knew that fitting the Weinert truck was going to need some care; thankfully it turned out simpler than I thought it would be. For a start it's important to retain the distance from the pivot to the axle centre, 22.5mm, no matter how you tackle the problem. So after spending a little time comparing the relative trucks I made my brave decision and started by assembling the Weinert truck in its entirety. The Fleischmann truck was then trimmed of brakegear and the axle slot to get down to the beam and pivot. The back part of this had a section removed to take the shaft of the Weinert truck. The Weinert truck lost its pivot and was trimmed so that it fitted in to the back of the Fleischmann truck and kept the critical 22.5mm dimension. The two parts were then superglued together. There was a little trimming required around the top of the arc-shaped pieces to clear the chassis and the overall up/down movement is still only +/-05mm, but it's enough. And, as the pictures show, the improvement in appearance is enormous!


