Back to Contents
Back to Railways Page
Link to Sitemap
BR(S), SR, LBSCR E4-class 0-6-2t
s2473
This is a fine piece of Dave's handiwork. The descriptions you
see below have been provided by him along with the photographs as
the build progressed. I'm delighted to get this page up, it's a
hugely impressive piece of modelmaking from the way the parts in
the kit have been dealt with, through to the dedication in terms
of the DCC sound installation and custom-programmed decoder.
Needless to say this loco runs as well as it looks...
Following on from Steph’s introduction I have always had an interest in the Southern Railway central section i.e. ex LBSC territory and in my early modelling career way back in the early 1980s I built 4mm scale layouts featuring LB&SCR locomotives and Southern electric stock. It was an invitation to Steph’s godfather's 0 scale layout which rekindled the Southern interest.
It was during a visit to the model railway show at Alexandra Palace, after some deliberation and discussion with Steph, I took the plunge and purchased the Roxey Mouldings O scale E4 kit. This being relatively easy kit to re-enter the British modeling scene to which I can put my previous kitbuilding experience to use and learn new techniques that the larger scale demands.
This is my first venture into standard gauge O scale locomotive kitbuilding having previously detailed and modified locomotives for On30 and built kits in 4mm and HO scale.
In addition to the locomotive kit I also purchased the recommended Slaters wheels.
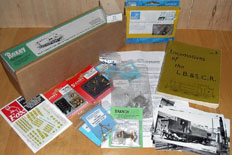
The photograph above, in addition to the basic kit shows the extra items that were included during the construction of the kit including Slaters hornblocks and brass buffers; Laurie Griffin and Meteor Models detail parts; 40:1 gearbox and Canon 1833 motor from Branchlines; SER Kits dummy Stephenson internal motion; Fox transfers decals and an ESU sound decoder. Also shown is some of the reference material that was used and a parts list can be found here.
I decided that I wanted the locomotive to be as near as possible to LBSC condition. After studying several photographs number s2473 was chosen as she retained most of her original fittings and was eventually preserved as Birch Grove on the Bluebell Railway. None of your Ashford smokebox doors and safety valves here, although I do have to accept the Ashford pattern injectors as a small sacrifice.
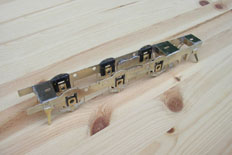
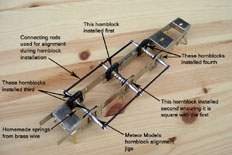
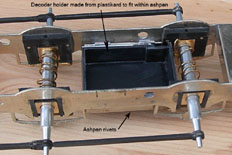
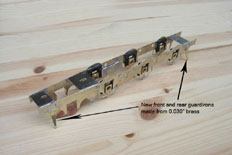
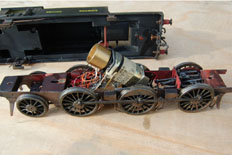
Not being one for convention, I started by creating 3 split axles and shorting the wheels for split axle pickup. Once completed this was followed by the fabrication of the connecting rods and brake shoes.
After this, my attention turned to the chassis proper. Firstly the frames were cut away in order to accept the Slaters hornblocks and then soldered together broadly in line with the kit instructions. The hornblocks were fitted as shown above. In addition I also made a new set of guard irons. All of the wheels use split axles except the centre driving wheels. The radial truck was fabricated as per the instructions except the sides were made from this double sided copper clad sheet. This enabled me to insulate the bearings. The truck is mounted to the chassis using large S shaped piece of 0.7mm brass wire to acting as a spring to keep downward pressure to aid track holding.
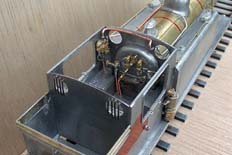
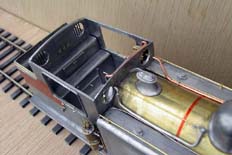
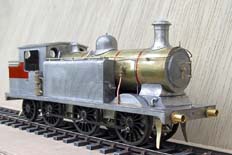
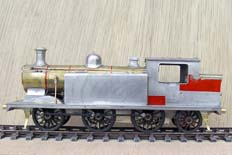
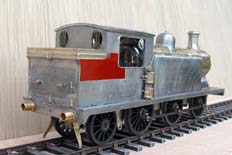
Here are some further pictures of the Roxey O scale E4 under construction.
The cab details are from Laurie Griffin, some of which have been adapted to fit and of course being dual brake fitted there are fittings for the Westinghouse air brake and the Southern Railway retro-fitted vacuum brake. The red patches are car headlight repair tape used to create the boiler bands and repair patches on the cab. The toolbox on top of the bunker is shown fitted incorrectly, the lid should be on top surface and this was corrected during the build.
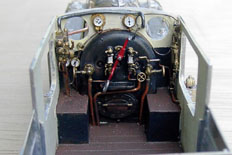
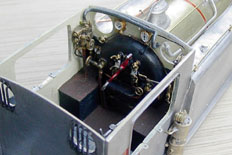
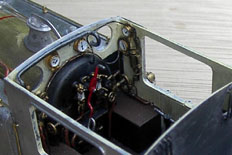
Here are some interior pictures of the cab. The cab interior is painted with Polly Scale Santa Fe whisker yellow and the fittings were primed with etch primer and finished with Vallejo brass, copper, bronze, red and oily steel acrylic paint.
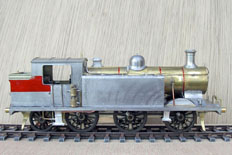
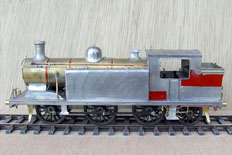
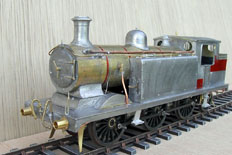
With the cab detailing out of the way my attention turned to the exterior plumbing. Obviously I was somewhat misguided into thinking it would be a lot easier than the European and American locomotives I have built and detailed. This was a fallacy as I was modelling the ex-LBSCR with its air and vacuum brakes with steam heating thrown in for good measure. I persevered and applied the plumbing. The moisture traps on the vacuum lines were made from brass tube sleeved over some Precision Scale moisture traps I had in my spares box. The pipework was either made up from copper, brass or fuse wire.
The body was washed, degreased and left to dry prior to painting. As can be seen the chassis is not yet complete as the sanding gear, steam heat pipes and CPL coupling hooks are yet to be fitted
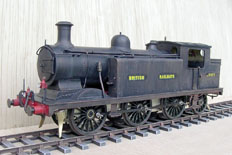
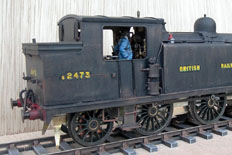
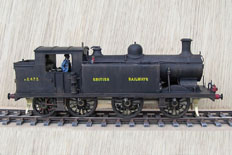
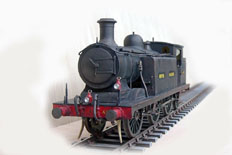
Here are a couple of pictures of the completed body. The black paint is Games Workshop 'Chaos Black' and the red from Revell. The weathering was carried out using Vallejo acrylic Paints. The decals are the Fox 4mm versions. The numbers are the correct height but the letter spacing of BRITISH RAILWAYS is a tad too tight. Unfortunately there is not an O scale version of the smaller sunshine lettering used on tank locomotives therfore I used the 4mm tender loco version.
The photos also show that there is a small amount of work on the driver's side of the cylinder chest.
Headlamps are Laurie Griffin's LBSCR versions. The reflectors were painted ATSF silver and the lens is a blob of epoxy. I think they have come out well.
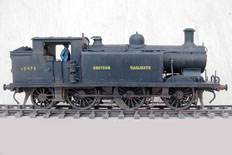
Here is a picture of the finished(?) article with new (unaffixed) cab roof. As I kept looking at the model there was something nagging in my mind that it was not quite right when looking at photographs of the prototype. It turns out the the cast cab roof in the kit was too thick and chunky which I presume is due to the limitations of the pattern for the mould. I therefore made a new cab roof from brass sheet, brass wire (gutters) and nickel silver strip (beading from the coal rails supplied with the kit).
To my eyes the new cab roof improves the model and will be fixed into place once I have painted and installed the remaining loco crew i.e. the driver.
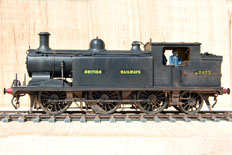
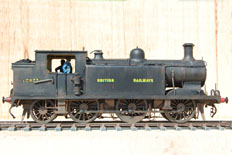
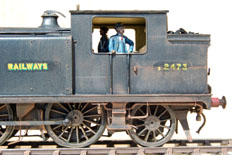
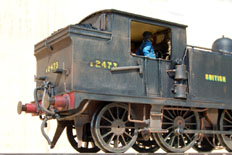
Here are a few more pictures of the E4 with the firemans hammer in the train staff holder, driver, CPL SR single shackle screw couplers and home made fire irons.
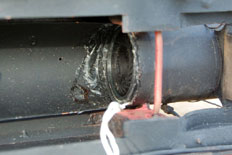
As alluded to at the beginning, the locomotive has been fitted with an ESU Loksound V3.5 decoder and 28mm speaker. Following many discussions with Steph about the principles of sound (mainly due to an interest in hi-fi) and reading Fred Severson’s paper Designing Locomotive Acoustics for On-Board Sound Systems (781kB .pdf file opens in new window), I decided to use this model to apply these theories.
The boiler is a rolled brass tube and I used this as the sound chamber. All joints, whether it was the smokebox door or any fittings, were sealed from the inside with epoxy thereby creating a sealed chamber from which the back sound cannot escape. The speaker, with the speaker cone outermost, was then fitted into the tube just inside the cut out for the motor. With my model this is 10mm behind the front of the tanks resulting in a sound chamber just under half the length of the smokebox and boiler.
The decoder was programmed, with many discussions with Steph, to achieve the correct timing of the ‘chuff’ with the wheel revolution and further modifications were made to the decoder CVs to create the initial loud blasts apparent when a locomotive accelerates and then quieter when the desired speed has been reached. Further improvements were made to replicate the ‘cut off’ i.e. no chuff when the locomotive decelerates or is coasting and the addition of rod clank sounds simulating worn bearings.
The large sound chamber creates a good depth of sound and s2473 sounds like a locomotive whether running or stationary - especially with the Westinghouse pump. This has been an interesting experiment and I now design and install the on-board sound system during the construction of kits rather than install them retrospectively.
And finally, for my next trick/build - a USATC/SR 0-6-0T....... and a layout of
course.


