Back to Contents
Back to Layouts Page
Link to Sitemap
Lokwerkstatt Zittau-Pethau
A HO scale 'operating diorama'
The number of times people have asked me; "what are you going to do with all that 'German stuff'?"...
"This" has been the usual response; motioning in an offhand way towards a old and well-thumbed copy of Eisenbahn Journal. Dave happened across an article in the August 1990 edition as he was once again attempting to chuck out some magazines. Needless to say he failed; and I ended up with more scrap paper. The problem was that the more we talked, the more the idea of a small shed layout continued to haunt me. Some years after getting the copy of the magazine from Dave I managed to do some wheeler-dealing and became the proud owner of four pre-assembled baseboards. Now I couldn't make any more excuses.
The problems of living in a flat... Let's get things in perspective here. I can (and have) built baseboards - some very 'interesting' stressed skin designs too, on occasion. But I didn't fancy living with wood-dust flavoured everything for any amount of time. So when the offer of a few 'spare', basic, strong baseboards came up I realised what a plonker I'd be if I turned them down. And they certainly are strong, the downside is of course the weight, the upside is that I can cut out large holes where required for scenic effects. Or the turntable. Or even to lighten the structure.
The Concept
Or; what on earth is an 'operating diorama'...?
We've got a lot of DR stock; Dave and I have between us got around 100 locos, loads of coaches (me), loads of wagons (Dave). And much of it has been 'breathed upon'. So developing a large roundy-roundy layout doesn't help. How can you see how good a model is if it's a metre away and batting past you at a scale 50km/h? And I live in a flat; so I haven't the space anyway.
Part of Dave's and my philosophy is the same attention to detail applied at every stage. It's why we use the bits and pieces we do; why we adopted DCC relatively early; why we use Kadees. So not only does the stock look good, it runs well and is reliable. Demonstrating those characteristics, even on a 'normal' layout can be difficult; so we needed a slightly different approach. And that's how I earn my reputation as a fully paid up member of the lunatic fringe. Ho hum.
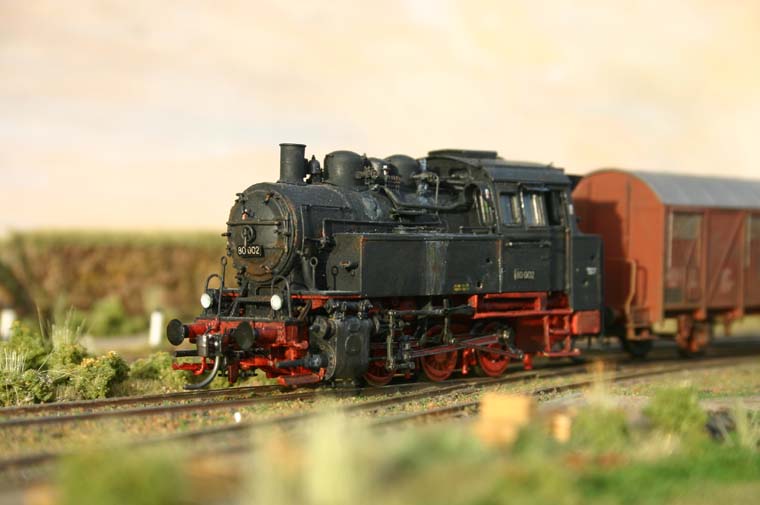
You might also have realised as you've looked through the rest of the site that we quite like to get the pictures looking good. And that sometimes we succeed. I mean; look at this for an example. I know Dave's a good modeller, but that photo still took some setting up. So the layout has to run well, show off the handbuilt stock (mostly locos) and be practical and look good enough to be used as a photographic set. It's not a layout; although it can be operated and we've thought long and hard about how we can operate it at a show. It's more an, ahem, operating diorama. Shall we go on?
Planning
Every journey starts with the first step
In a similar vein every layout starts off with sketches on bits of paper which eventually are translated onto larger bits of paper, firmed up, re-drafted more firmly with pens of increasing permanence until something like a 'final' design emerges. We did this on August Bank Holiday Monday 2005. Thanks are due to both Malcolm Horne and Dave for making the time to come and help. We got the layout drawn up on the baseboards and even had time to move some stock around and photograph the results for our mutual amusement...
 This is taken from the front left hand corner of the layout. This is probably going to be the view of one of the operators; on the same side as the public. We'll be using DCC handheld controllers normally, unfortunately the turntable can't be DCC operated for reasonable cost. So we're dependent upon being able to reach the turntable's controls to operate the layout.
In this view all is not necessarily what it seems. For example the upturned polystrene box is an office, the slideboxes mark out the (six stall) roundhouse and the kitchen roll is actually a chimney. Go on; let your imagination run wild. We did ;-)
 This is the view from the other operator position; on the front left hand corner. The 'skirt' coach is going to be grounded. It should actually be a VT137 005 - 024 series DMU body. But that would mean grounding a Westmodel brass kit. Which is a bit of a pain in the wallet. I suppose one of the Liliput or Piko VT137 units might be better; We'll see what happens when the time comes. The white box on the right by the shed wall is the position of an office. We've carefully fiddled the turntable road angles to make it fit better and improve the operation.
 This shot was in here to see whether the clearances are where they should be. The snowplough is by Märklin, destined to be detailed and painted orange. One of the joys of doing a workshop (Werkstatt) rather than a shed (betreibswerke) is that service stock can make occasional visits. I'm making a few bits and pieces specifically for that scenario. And, yes; I did say orange...
 The cigarette lighters show the position of the watercranes. Lovely Weinert Sachsen ones. I need to decide on whether to paint them blue or black after I've built them. The road in the background that's got the BR52.80 and BR50 parked back to back will include a programming track. Useful in case of emergencies, or new stock purchases. Goodness; 3:30 already - guess I'd better put the kettle on!
 The major deviation from the prototype is the use of two parallel entry/exit roads with a point; it should only be one road, running as single track down to the main line that leads from Zittau to Großschönau and Löbau.
 One last quick view. This edge will be filled in, providing a smooth, rather than staggered, front to the baseboards. The in-fill piece will include the controls for the turntable together with the sockets and configuration switch for the DCC. And a shelf for pint pots and tea mugs...
Next steps
Don't you know it's rude to point?
The next stage will take place off the boards. I've got the point to build first. One of the problems with modelling HO with the finer wheel profiles is that there's no European outline track to the NMRA standards. And yet there are several ways to get hold of wheels that are close to the NMRA's RP25 profile. So it's back to track building. I've built bullhead rail points in both 00 and P4 gauges, but never with flatbottom rail. And I'm not looking forward to it.
Along with that is setting up the turntable. The Roco one is quite superb, but it needs the appraoch roads fitting and a couple of odd modifications to make it spot on for the layout. There are few other odd jobs to complete, such as the general assembly of things like ashpits, watercranes and other structures before we start fixing anything down on the boards...
 This is taken from the front left hand corner of the layout. This is probably going to be the view of one of the operators; on the same side as the public. We'll be using DCC handheld controllers normally, unfortunately the turntable can't be DCC operated for reasonable cost. So we're dependent upon being able to reach the turntable's controls to operate the layout.


